-
By

- February 12, 2025
- Bug Out Bags
How to Pack a 3 Day Bug Out Backpack: A Complete Guide
When disaster hits a city, things go sideways fast. Power outages, water shortages, supply chain breakdowns—urban environments aren’t built for chaos. That’s why having a 3 day bug out backpack packed and ready is one of the smartest things you can do.
This guide walks you through everything you need to put together a lightweight, practical, and effective 72-hour survival kit for urban emergencies. Whether it’s a blackout, a natural disaster, or civil unrest, you’ll have what you need to get through it.
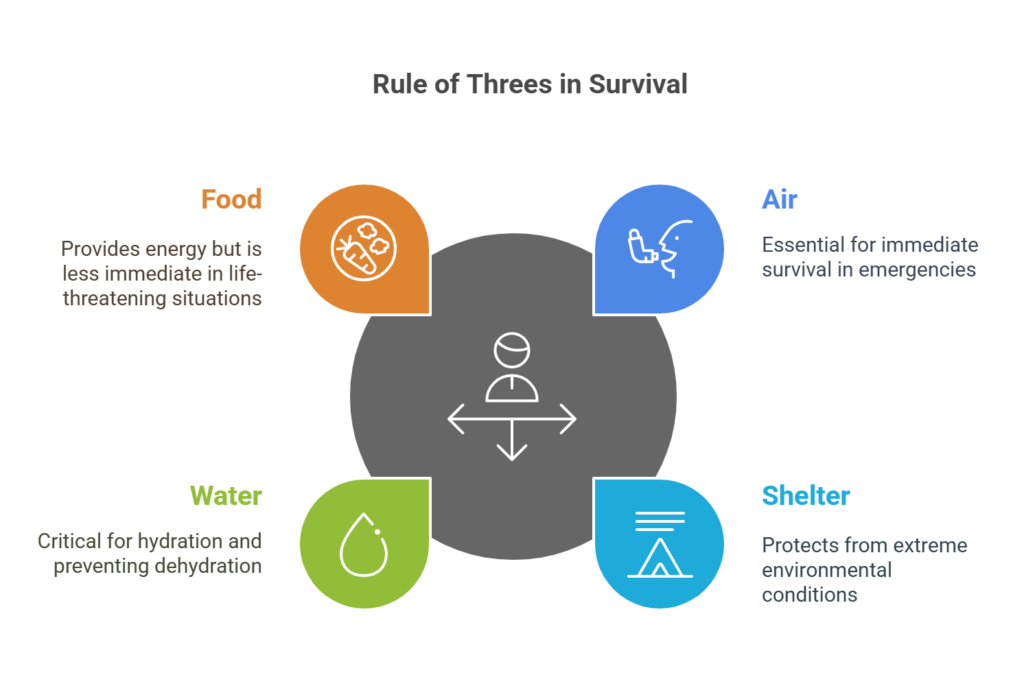
1. The 3-Day Rule for Urban Survival
Before stuffing a 3 day bug out backpack full of gear, it’s good to understand the Rule of Threes, which helps prioritize what to pack:
- 3 minutes without air – Situational awareness matters, but air quality could too (think fires or dust from collapsed buildings).
- 3 hours without shelter – Extreme heat, cold, or wet conditions can be life-threatening.
- 3 days without water – Dehydration shuts the body down fast.
- 3 weeks without food – Hunger sucks, but it’s not an immediate killer.
Takeaway: In an urban setting, water, shelter, and staying mobile should be top priorities when packing your bag.
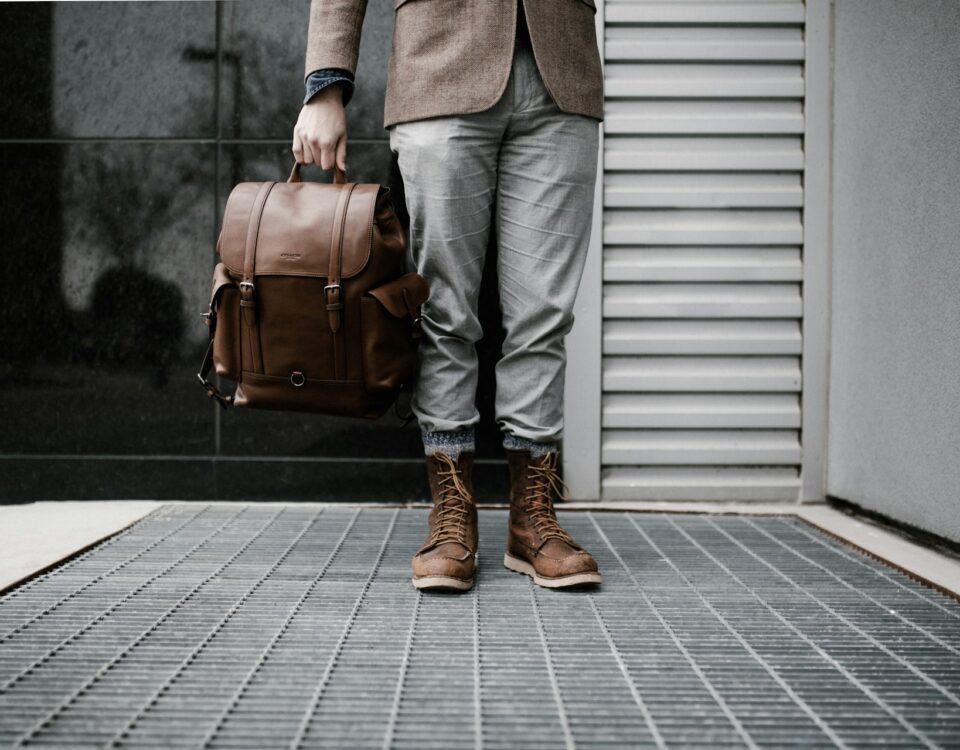
2. Choosing the Right Bag
The 3 day bug out backpack itself is just as important as what goes inside. A bulky, military-style backpack screams, “I’ve got supplies,” which could make you a target. Go for something discreet and durable.
What to Look for in a Good Urban Survival Bag:
Size: 25-40L capacity (big enough for supplies but not too heavy)
Comfort: Padded straps, breathable back panel, and adjustable fit
Durability: Water-resistant material, reinforced stitching, strong zippers
Organization: Multiple compartments for easy access
Stealth Factor: Avoid bright colors or tactical designs
Recommended Options:
- High-quality hiking backpacks (Osprey, REI, North Face)
- Gray man-style commuter bags (e.g., 5.11 COVRT, Incase Icon)
- Roll-top waterproof bags for extra protection
3. Water and Hydration: Staying Hydrated in a City Crisis
Water is non-negotiable. The problem? Bottled water runs out fast. The trick is carrying a mix of stored water and ways to purify more on the go.
What to Pack:
3 liters of water (minimum) – Emergency pouches or bottles
Collapsible water bottle – Saves space when empty
Water purification tablets – Lightweight and effective
Portable water filter (Sawyer Mini, LifeStraw) – Turns sketchy water into something drinkable
Extra Tips:
- Refill whenever possible—water supplies vanish quickly in an emergency.
- Keep water in different spots in your bag to balance weight.
- Know your city’s water sources—fountains, rain collection points, etc.
4. Food and Nutrition: What to Pack for 72 Hours
Food isn’t as urgent as water, but hunger affects decision-making and energy. In a survival situation, you need high-calorie, no-cook foods that don’t take up much space.
Best Foods for an Urban Survival Bag:
Energy bars, protein bars (6 total) – Compact, calorie-dense, and require no prep
MREs (Meals Ready-to-Eat) or dehydrated meals (3 total) – Long shelf life and high in protein
Nut butters or trail mix – High in healthy fats and proteins
Small metal cooking pot – Can double as a cup for boiling water
Utensils (spork, P-38 can opener) – Eating cold food is one thing, but wrestling with packaging is another
Packing Strategy:
- Use vacuum-sealed bags to keep everything fresh and compact.
- Avoid salty or overly dry foods—they make you thirsty.
- Stick with stuff you already eat so your body isn’t dealing with weird food reactions during an emergency.
5. Shelter and Clothing: Protection from the Elements
Surviving in a city means you might have to move, wait, or even sleep outdoors. Having basic protection from the weather can make all the difference.
Shelter Essentials:
Emergency blanket – Traps body heat, lightweight, and compact
Lightweight tarp (with paracord) – Can be used as a rain cover or ground mat
Compact rain poncho – Keeps you dry without taking up much space
Clothing to Pack:
Extra socks (2-3 pairs) – Dry feet prevent blisters and infections
Moisture-wicking base layer – Regulates body temperature
Lightweight gloves – Useful for warmth and handling rough materials
Hat or beanie – Protects against cold or sun exposure
Comfortable, durable shoes – You might be walking long distances
Packing Tip:
- Choose neutral-colored clothing to blend in and avoid standing out in a crowd.
6. First Aid and Medications: Handling Emergencies on the Go
In an urban disaster, help might not come fast. A first aid kit helps you deal with minor injuries, but medications are just as critical.
What to Pack in Your First Aid Kit:
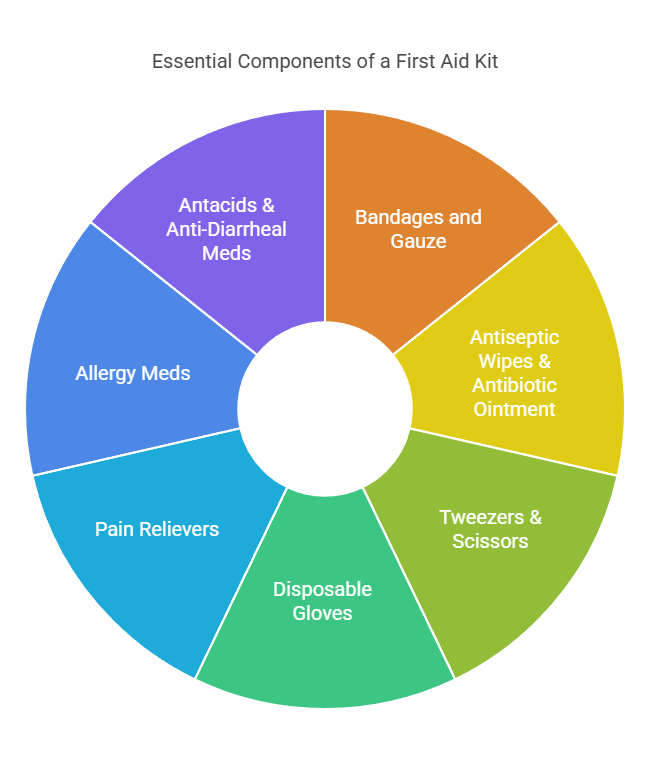
Bandages and gauze – For cuts and scrapes
Antiseptic wipes & antibiotic ointment – Prevent infections
Tweezers & scissors – Useful for wound care
Disposable gloves – Protects against contamination
Pain relievers (ibuprofen, acetaminophen) – For pain or inflammation
Allergy meds (antihistamines) – Stops allergic reactions
Antacids & anti-diarrheal meds – Stress and strange food can mess up digestion
Medications:
✔ 7-day supply of prescription meds (in a labeled, waterproof container)
✔ EpiPen or inhaler (if needed)
Bonus Tip:
- Rotate medications every few months so they don’t expire.
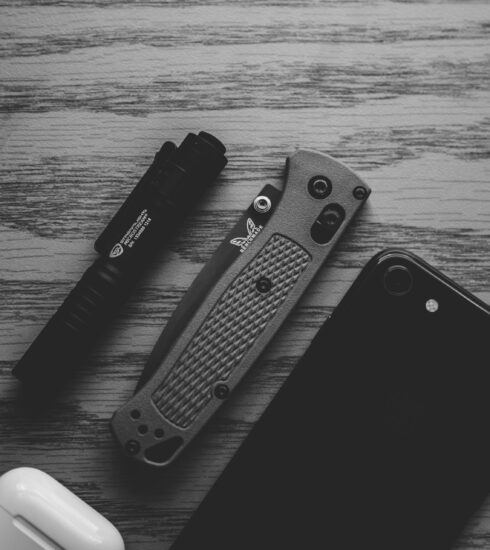
7. Tools and Equipment: Must-Have Urban Survival Gear
A few well-chosen tools can make surviving in a city much easier. Think practical, multi-use, and compact.
Core Tools to Pack:
Multi-tool (Leatherman, Gerber, Victorinox) – Covers cutting, opening, and repairs
Duct tape (small roll) – Temporary fixes for gear, shelter, and even medical uses
Flashlight or headlamp (with extra batteries) – Hands-free lighting is a game-changer
Paracord (50 feet) – Can be used for shelter, repairs, or even makeshift shoelaces
Zip ties (5-10) – Great for securing gear or improvising fixes
Why These Matter:
- Multi-tools replace a whole toolbox.
- Duct tape is like urban survival duct magic.
- A flashlight keeps you safe at night and during power outages.
8. Communication and Navigation: Staying Connected and Informed
In a crisis, knowing what’s going on can keep you one step ahead and informed. Phones die, GPS can fail, and cell towers might be down.
How to Stay Connected:
NOAA weather radio (battery-powered or hand-crank) – Keeps you informed
Cell phone with charger & backup battery – Store important contacts offline
Pen & paper – Write down addresses, instructions, or emergency plans
Navigation Tools:
✔ Local map (paper version) – GPS won’t always be reliable
✔ Compass – A basic backup if you need to move through the city
Tip:
- Having a meeting point in case family or friends get separated is always nice to have ready to share.
9. Personal Documents and Cash: Preparing for Identification and Transactions
If ATMs are down or banks are closed, cash is king. And in an emergency, proving who you are matters.
What to Carry:
Photocopies of important documents (ID, insurance, emergency contacts)
$100-$200 in small bills – Avoid needing change in a crisis
Credit card or prepaid debit card – Works if power is still on
Security Tip:
- Store documents in a waterproof pouch to keep them safe from rain or spills.
10. Miscellaneous but Essential Items
Some things don’t fit neatly into a category but can still make a big difference.
Urban Survival Extras:
N95 mask or bandana – Useful for dust, smoke, or air pollution
Work gloves – Protects hands from glass, debris, or rough surfaces
Lighter or waterproof matches – Fire might be necessary for warmth or signaling
Personal hygiene items – Toothbrush, wipes, soap, deodorant
11. Packing Tips: Maximizing Space & Efficiency
A well-packed 3 day bug out backpack is easy to carry and lets you grab what you need fast.
How to Pack Smart:
Heavy items near your back – Keeps weight balanced
Frequently used items near the top – Easy to reach
Waterproof important gear – Use Ziploc bags or dry sacks
Spread weight evenly – Avoid back strain
Test your bag by wearing it for a walk—you’ll quickly find out if it’s too heavy or uncomfortable.
12. Regular Maintenance & Updates
A 3 day bug out backpack isn’t “set it and forget it.” Supplies go bad, seasons change, and your needs might shift.
Checklist for Keeping Your Bag Ready:
Swap out food & water every 6 months
Check battery-powered gear to make sure it still works
Adjust clothing for the season
Update medications to avoid expired pills
Final Thoughts: Be Ready, Stay Safe
An urban survival bag isn’t just for doomsday preppers. It’s a smart, practical safety net for anyone living in a city. The goal isn’t paranoia—it’s being ready for whatever comes next.Take the time to build your 3 day bug out backpack. When the unexpected happens, you’ll be glad you did.